Konichiwa!

Hello...I am Dracula! I bid you velcome!
(....Well, one of those statements is not entirely true...)

Thank you for stopping by "noms4noobs", your source for gamer grub of many varieties! I wanted a place where I could play with my food before playing with the guild, and show others how to do so as well.
Ever watch an anime and see the cute little Bento (or "Obento") boxes and think, "I wish I could make one..."
Ever look at your dry, ten cent ramen and wonder, "I wish this looked like nommy ramen on TV..."
Do you struggle with having ten minutes or less to make a meal that is mess free for easy gaming?
Are you tired of having your LAN parties being more like LAME parties?
Wonder where to eat when you leave the house?
Then you, my nerdy and or geeky friend, are in luck because you can now has the cheezburger and so much more!
I also want all these things to be fixed, and want to fix few of these things as well! So with my limited sense of humor and clear sense of taste I welcome you to a place where you can read, watch, and learn how to be 0083|2 1337 instead of a |\|008 when it comes to noms~!

Friday, November 18, 2011

How To Cook: Bunny in a Hole


"Toad in a Hole" was one of my favorite things to eat for breakfast growing up, it was one of the easiest and tastiest things to make. So I chose to take this and add some zest to it! So since my nickname is "Little Bunny/Bunny Bunny" I added a twist and changed the name. Hopefully you will also find this easy to make. So let's get it on like Donkey Kong!


What you will need for each serving/slice is
1 Slice of toast
1 Egg
1 Piece of ham (Canadian Bacon, Bacon, Lunch Meat, Whatever)
Shredded Cheese

If you also want Hollandaise Sauce with it (I highly recommend it)
Per serving you will need
1 Egg yolk
2 Tablespoons butter
1/4-1/2 Tablespoon Lemon Juice
A couple drops of that sauce you cannot pronounce (Worcestershire)
1 Teaspoon crushed and dried Parsley


You want a good non-stick pan for this because if you do not then the egg will stick and pop out of the bread like Punxsutawney Phil on Groundhogs day! We want a yummy "sunshine sandwich" not 6 more weeks of winter!

Heat that pan to Medium-Low

Butter the bread on both sides. Then take the bread and cut out the middle with a biscuit cutter, knife, or glass. I like to keep the centers of the bread and toast them.

Put the bread in the pan and crack the egg into the middle of the bread.


Once you see that the white is solid on the other side flip it over and let the other side cook.


The egg should be cooked to how you like it (I like a mostly cooked yolk) and the bread should be lightly toasted.

Keep an eye on it so that the bread does not burn.


You can do however many you want, I cooked two pieces when I made it.


Stack your toast how you would like it.


Heat up the ham how you would like it, about 10 seconds in the microwave works.

Add that to the top of your toast.

Shred your cheese on the top and you can eat it just like that.


OR

You can make Hollandaise sauce for the top!

People seem to make a big deal about this but it is one of the easiest things to make once I learned how.

Separate your egg/eggs. Whenever I use egg yolks I will put the whites in a container in the fridge and next time I make scrambled eggs add it to that. Basically, I hate to waste food.

Mix the egg with the Lemon juice, parsley, and Worcestershire sauce.

In a separate bowl melt the butter, take a few seconds in the microwave. For the lemon juice you add either 1/4-1/2 Tablespoon to it per egg. I like mine more acidic to cut the rich taste of the dish.

Then slowly add the hot butter to the egg mixture and serve.

Something to know with this is to make sure the butter is hot! Because you cannot reheat this sauce, then the eggs will cook.


Drizzle that on top of the bread.


I wanted to make something more more fun with this so I took the toasted centers from the bread and used some cookie cutters to get some shapes out of them. I chose bunnies, of course.


It came out looking like this.


Not to brag....But this tastes freaking delicious! I crave it so much since I made it and as I write this I am tempted to make another piece in the kitchen.

I hope you enjoy this and have fun cooking!

Enjoying the noms of their labor,
-C.A.M.

p.s.
My dog, Baron Von Joby, also enjoyed the little cut out not in the picture there (if you were wondering why there was only one bunny cut out on the side)


Wednesday, November 16, 2011

Portal Cupcakes


When it comes to baking cupcakes are on of the easiest things to make, but I find it far more fun to take something as simple as mini cakes in wrappers and make them pretty awesome. So naturally I decided to make something geeky, delicious, and a bit weird this week out of yummy little desserts.


In order to make these you are going to need to have some time on your hands, multi tasking skills, as well as a few other things.

1 Box of cake mix (probably going to want yellow, white, etc.)
1 bag or roll of cookie dough (something that you can make cut outs with, I used sugar cookies)
Blue and Orange Jello (Depending on how many you want to make - 1 box will only fill about 4-5 cupcakes so you may want 2 boxes or more of each color.)
Icing or frosting (I used white buttercream)
Cupcake wrappers (I used foil)


You will also need a piece of paper, a small sharp knife, a pen (or a gingerbread man cookie cutter),a small spoon, a ladle, a baking sheet, and a cupcake pan.


The best way to save time on this is to make the different parts of the cupcakes in a certain order.

First thing you want to do is make to cookie dough. You can make this from scratch, buy a mix, or buy one of those pre-made logs. If you have the pre-made kind then you can skip this step.
Mix up the dough according to the instructions or recipe and make sure you are making the kind for cutout cookies or your little portal men are going to be little blobs. One of the best ways to make them better for cut outs is to add about 1 Tablespoon of flour to the batter if the dough is made for drop cookies.


After it it all mixed and kneaded roll it into a log and wrap it in some clear wrap, or if you have none a plastic baggy. Put it in the fridge to chill and then we will come back to that later.


Next you are going to mix the cake batter. Make it according to the box instructions or the recipe you are using and preheat the oven.


Line your pan with the wrappers. The reason I used the foil ones is because it is technically 2 wrappers, a paper and a foil each. You want the wrappers to be thick on these because you are putting a filling in them.


You may want a type of ladle or spoon to fill the cups evenly and to avoid a mess.

Fill them up about a little less then halfway. If you over fill these they will spread all over the pan and the tops will be huge! We do not want that, we want nice even tops.


Now you want to either jiggle the pan back and forth or gently tap it on a countertop to get all the bubbles to the top and popped. You don't want little air pockets in the cupcakes.


Once you think you have sufficiently de-bubbled your cakes bake them.


That is a good looking surface for the portal to come through!


Place the cupcakes on a cooling rack or the counter to cool while we work on the rest of these.


While you are cooling and baking your cupcakes make the cutout for your little portal man. You can use a gingerbread cutter, or even these fancy ones here, but for us poor people use this method. Also, you can make your portal men look anyway you like this way! You can go crazy or classic.


I chose to go with the more classic portal pose.
Draw an outline on a piece of paper and cut it out. You want to have a pretty long torso (longer than the one pictured) because you are cutting them in half and part of each piece will be going into the jello. You want them to be pretty small to be able to fit and thin because they are going to spread out a little while baking.
(And, yes, they do look like chalk outlines on dead bodies, this is a thing I know.)


After your cupcakes are done baking change the oven to the cookie temperature.


Break off a small part of the cooled dough and roll it out thinly on a clean and well floured surface. Place your cutout on the dough and cut around it with the small knife. Then after cutting out the desired amount lift up the excess dough and remold it.

Place the cookies on a baking sheet about one inch apart and cook them for about 5 minutes and check on them, you don't want them to over cook.


Once they come out you are going to want to cut them in half, if they cool too much before you cut them then they can crumble when you try to cut them. Once they are a bit hard and easy to move place them on the cooling rack and let them finish cooling. Repeat this until you have the amount of cookies you need, remember that one cookie if for 2 cupcakes so you do not need too many.


While you are baking and cooling your cookies begin making the jello. separate the gelatin into two bowls and heat some boiling water in a kettle or the microwave. For each packet you are going to add between 1/2 - 3/4 cup of boiling water. This gelatin needs to be thick so that's why we use so little water. (You can also simply follow the "jigglers" recipe on the Jello brand boxes)
Mix until the jello is dissolved and place in the fridge. You want it to be thick but not solid!


Next you want to take those cooled cupcakes and hollow out the middle carefully, you do not want to go too deep or too far to the side. Gently cut out a hole and pop out the center, it should be about the size of a "doughnut hole".


Now that you have your baked goods make and cooled we should put these together before someone thinks you are a homicidal maniac, what with all the hollowed cakes and halved bodies in your kitchen.


Once the jello is thick (almost like pudding texture) you want to start filling the cupcakes. If it is too thin then the cake will just soak it all up and if it's hard then it won't go in right so this is all about timing. If you find that it got too hard then you can microwave it for about 15-20 seconds to loosen it back up.


Fill up the cupcakes half orange and half blue, then frost the rims.

It should look something like this!

Fill them up with as much jello as you can since it will settle a little bit after you fill them.


Next stick the little portal men halves into the "portals", put the legs in one color and the tops in the other. You want to do this before the jello hardens too much, otherwise they will not stay put.
Then place them in the fridge to finish cooling for a couple hours or overnight.


(People will probably be very confused when they open up your fridge, so be prepared for that.)


So there you have it, Portal Cupcakes! Congratulations! These are fun to make and have a really unique taste, and not in a gross way!


This cake is not a lie.

(You were waiting for me to say something like that, weren't you?)


Another tip for you is that if you do not want these to be portal but still want to try them you can make "Hot Tub Cupcakes", I used to make these for pool parties all the time.


Same recipe except you take Teddy Grahams and put little jelly rings around them and stick them in the Jello. You can also make little lounge chairs from mini cookies or graham crackers.


So if you take these to the pool or to the grooviest party I hope you enjoy them and wow all the people attending.

Enjoying the noms of their labor,
- C.A.M.

Tuesday, November 1, 2011

The Otaku's Generic Anime Bento


So, if you are anything like me then when you watch your favorite Anime you think, "I want to make a Bento Box
like that!" and then you try to figure out how to make the delicious animated lunch you see on the screen.
But, alas, 'tis all in vain! You can
not seem to do anything right!

Well I have wonderful news! After all my years of personally searching I have figured out how to make a basic Bento! In this post I will show how to make;
Tako Sausage (Octopus shaped sausage)
Tamagoyaki (Sweet egg Omelet)
Steamed and decorated white rice
Edamame (Soy Beans)

And there was much rejoicing!

(I'm sorry, but we will save the elusive bunny shaped apples for another time)

So lets get it on like Donkey Kong!

Tako Sausage


First thing that you MUST do if you want to make these is to get the right kind of sausages! I do not know if I can stress how crucial this is. Part of the reason that it took me so long to figure out how to make these right is because I kept using the wrong type of viener over and over again! NIEN! You cannot do that as well! There is no using Little Smokies, Cocktail Wieners, and absolutely no Vienna Canned Sausages! NO BUENO!

What you want to use is this!


This is an Asian Mini Pork Sausage pack found at the local (or non-local) Asian Market. You can choose any flavor you would like ;)

Once you have that you can begin.


Get your best non-stick pan and add a little bit of oil to it, and set it to medium-low heat. Let that heat up a little bit, make sure the pan does not get too hot because then you will have burnt octopuses (Octopi?), and although that may sound appealing to you, it does not to me...


Then you are going to thaw your delicious sausages. You want roughly four per person. Do not cook them in it for too long, you just want them thawed enough to cut easily.


Get out the sharpest knife you have, and it should also be small.


Now you are going to cut these about half or two thirds of the way up the sausage. You can either cut four legs (recommended version) or, for the super realists out there, eight legs. Just slice down the side and cut it in half, then turn and cut it again.


It should look something like this.


Next, put the little bugger right in the pan and watch the magic! O.O


It will start to open up and the little legs will curl up and out forming kawaii little tentacles!


Once they have spread apart a bit then you want to prop it up so that they fry in that position. It only takes a few minutes to cook each one.

Once you get the hang of it you can cook a bunch of them at once, but keep a close eye on them making sure they do not burn! (You know how I feel about the burnt octopi)


I would suggest only doing three to five at a time so that you can keep a good watch on them.

Look at the cute little dancing ocean-animal-shaped meat creatures!


You can cook them plain like this or add seasoning like soy sauce to them.


Speaking of eyes, if you want those then you can has! I warn you now though, it is quite a pain in the spiders back carapace to do this!

Take some sesame seeds and stick them in for eyes, the darker seeds the better. It will be difficult to stick them in (you will probably need to puncture a little hole in it

first to be able to do so) before you put them in the pan.


Set these aside and we shall now move on to the other dishes.


Steamed Rice

This is a pretty simple thing, but because it is simple it can be messed up easily as well. I like to use a rice cooker to do this, if you do not have one than you can use a pan. You will want to use Jasmine Rice for Japanese cooking.


When I cook rice I average about 1/2 cup rice per person. Measure that out into the cooking utensil of your choice.


You are going to need to rinse the rice, it will look cloudy once you add water to it. Rinse and drain the rice about four times or until the water is relatively clear. (It should be like tap water, not lake water!)


I find the best way to rinse it is to add about double the water and then make a claw, like an evil villain or 80's rocker, and then spin it around the rice a few times (about 20 seconds), then drain the water and repeat.


Once the water is pretty clear CAREFULLY drain the water out (It is not the end of the world if there is a little bit left in there).

Then add an equal amount of water as rice and then add an extra 1/2 cup of water (a little bit more than 1/2 if you are doing it on the stove top.)


Plug it in and let it cook, unplug it immediately once it is finished so the rice does not burn. For the stovetop cook on low heat for 15-20 minutes and keep a close eye on it.


When you are putting together the Bento you can add whatever you want to the rice, seaweed is preferable. You can buy strips, sheets, or flakes to put on top.


These are a few of my favorites, also found at the local or non-local Asian market!


Tamagoyaki (For Noobs, Sweet Egg Omelet)

I developed this recipe myself, I tried a bunch of others and they did not taste how I wanted them to. For some people it will take a while to get used to a sweet egg, we are so used to our salty ones after all, but it is a really easy and tasty snack once you know how to make it.

Ingredients for this per serving are,

1 Tablespoon cold water, 1 egg (room temp. not cold), about 1/4 teaspoon soy sauce, and about 1 teaspoon of sugar.


*Most people use sugar and salt but I prefer the taste soy sauce and it is less grainy that way.
I eyeball it when I add the ingredients but I found that the measurements are just about right. You can do it to taste if you like it saltier or sweeter, but keep in mind it is a SWEET egg omelet, not your mamma's Tex-Mex Fiesta Grande omelet!


Mix this very well, you want the sugar to be mixed in and dissolved or you will have an odd grainy mess on your hands, ewwwww....

You also want it mixed well so it comes out yellow and not multi-colored!

<- Mix it even more than this!


Your pan should be the best non-stick pan (to the rescue yet again!) and it should have some oil, shortening, etc. in it because you cannot afford for the egg to stick on the pan at all.
Heat the pan to Medium-Low, like a 3 out of 10. Make sure to keep an eye on the heat, the egg should not sound like a snake when it hits the pan (SSSSSSSS!!), it needs to be cooked slowly.

If you are cooler than me you will use a fancy square pan to cook this in, it makes it come out looking a lot sharper.


Pour the egg mixture into the pan and make sure it is spread out thin and evenly.
Let it cook so that the bottom is cooked all the way and there is a little bit of raw egg on the top, this is used for it to stick together and roll it up.


Flip it about 1/3 of the way across and let it sit for a few seconds, then fold it again so there is only a little bit unrolled and let it sit for a few seconds, then fold it al the way over and let it cook on one side for about 30 seconds and flip over and let it cook another 30 seconds. You want the egg to be slightly undercooked.


It may take a few tries to get good at this, just serve the good looking ones to the guests and keep the others for yourself. ;)


Remove the omelet and let it rest for about a minute. If there is any excess oil you will want to dab that off.

Then cut them however thick or thin you would like, I do about an inch wide per piece.


Set them aside, they can be hot or cold when you eat them.
Each omelet should yield about six pieces.


Edamame (Soy Beans, once again for the noobs)


This has to be the hardest one out of all of these to make!!!

....Kidding.

This is the easiest thing to make out of all of these, you do not even need to go to the non-local Asian market to find these!


First, buy some Edamame. You can find them in the frozen section of pretty much any grocery store. Some even have the "Easy Steam" thing going on, where you just stick the bag in the microwave and heat them in the bag.
You can steam these in the little steamer piece on your rice cooker, but I do not like them over cooked so I prefer separate cooking.


Defrost them in a microwave or in a pan so they are hot.


Add salt if you so wish and set these aside as well.


Making Your Bento

Now that everything is ready and "set aside" we can get to the fun part!


I have a plethora of bento boxes myself, if you do not you can use a plate or a tupperware, that is what I had to do when I started. :)


Put the rice into the container of choice and lightly pat it down. Add whatever topping you would like to it, pickled plumb, seaweed, etc.

I used a mixture of seaweed and rice crackers, my favorite flavor wise.

Put the Edamame next to that, using fancy plastic grass if you have it to separate them.


In the other side place your little Tako Sausages and
Tamagoyaki. I added a little soy sauce bottle shaped like a fish, because I think it is pretty kawaii~!


There you have it!


This is how I made mine, but it is all about getting creative and making it look however you would like!


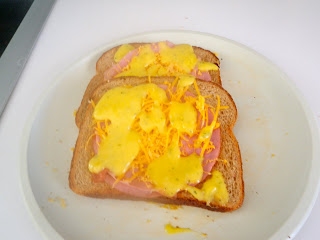
If you have no bento box you can also make it like this.


Hurrah for plates!


I do realize that it does not look exactly like the ones in the Anime, but do people really look like that? Hmmmmm? :/


Anyways, congratulations! You are now ready for watching you favorite Anime! (I will not accept Naruto, Bleach, or anything else that is Americanized on Cartoon Network BTW, more like Rurouni Kenshin, Rayearth, Darker Than Black, Azumanga Dio, FMA, or FMP)

You can also give this to the person you like, take it to the sports meet or cultural festival, or any other typical activity you see an Anime character partaking in!

Have fun ;)

Enjoying the Noms of their labor,
- C.A.M.