Konichiwa!

Hello...I am Dracula! I bid you velcome!
(....Well, one of those statements is not entirely true...)

Thank you for stopping by "noms4noobs", your source for gamer grub of many varieties! I wanted a place where I could play with my food before playing with the guild, and show others how to do so as well.
Ever watch an anime and see the cute little Bento (or "Obento") boxes and think, "I wish I could make one..."
Ever look at your dry, ten cent ramen and wonder, "I wish this looked like nommy ramen on TV..."
Do you struggle with having ten minutes or less to make a meal that is mess free for easy gaming?
Are you tired of having your LAN parties being more like LAME parties?
Wonder where to eat when you leave the house?
Then you, my nerdy and or geeky friend, are in luck because you can now has the cheezburger and so much more!
I also want all these things to be fixed, and want to fix few of these things as well! So with my limited sense of humor and clear sense of taste I welcome you to a place where you can read, watch, and learn how to be 0083|2 1337 instead of a |\|008 when it comes to noms~!
Showing posts with label japanese food. Show all posts

Saturday, January 28, 2012

How to Cook: Ramen

When it comes to Ramen people think there is two kinds; The cook Ramen Shop kind, and the gross (in comparison) one you make as home in the microwave when there is nothing else to eat.

But, I say that there is a third! It is the in-between Ramen. You make it at home in a short amount of time, and it tastes very good as well. I have pretty much always been a particular eater when it comes to ramen. I like it to be flavorful, the noodles to not be mushy, and the broth to not taste...starchy. So I came up with a method to make tasty, quick ramen for all of my MSG cravings!


You will need:

- A Pot with a Lid
- A Frying Pan
- A Fork and Chopsticks
- A Bowl for your Ramen


Ingredients:

- Ramen packs (depending on amount of people)
- Olive Oil
- 1 Egg (per person)
- Vegetable of Choice (Squash, Pumpkin, Soy Beans, Greens, mixed veggies, etc. Whatever you like best and have available. )
- Soy Sauce, Meme Sauce (optional), Seasoned Salt (or salt and pepper)
- Meat of choice - Shrimp, beef, chicken, etc. (optional)
- Kimchi or Hot Sauce (optional, for wimps)
- Seasoned Nori Strips (optional)

When it comes to cooking your ramen "fillings" there are many options. I like to have squash, soy beans, or some frozen mixed vegetables in mine. I will use left over meat bits, or thaw some shrimp at times as well. I always try to have egg with it, and I love to put Kimchi and the spicy liquid from Kimchi in mine.


First, fill the pot with water, about an inch from the top, cover it and place on a burner on Med-High.


The way that you make this quickly is that while the water is boiling you cook everything else needed, this also helps for people who have patience issues, when it comes to food, and stare at the pan the whole time (like myself). 


Get out the ramen packs you want to make and take out the solid squares and the packets, leaving the little scrap noodles in the wrappers. Then, set the noodles on top of the package, to keep it clean.


Like so.


(I am cooking for 3 people, with all these fillings you only really need one pack per person.)


Next, take the vegetables you want to put in the ramen and get them chopped or thawed. Take your frying pan and add about a Tablespoon each of Oil, Soy Sauce, and Meme (if you have it), and add about 1/2 Teaspoon Season Salt (or salt and pepper), and if applicable other seasonings you like.


 These are my favorite flavorings, they go well with the ramen so that the taste will "blend" when they are added together. 


(Yin-Yang?)


Coat the vegetables evenly with the liquid and cook them until tender. (I was making ramen for 3, once again, so there is a lot in my pan.)


Once the vegetables are finished, add the meat to the pan (add more of the sauce mixture if needed) and cook until hot, for leftovers, or...cooked, for raw.


Meanwhile, be keeping an eye on the water. Once it is at a rolling, rapid boil, add the noodles and be stirring apart with a fork (or chopsticks).


Keep the lid off, you are about to use it.


Stir them apart and keep the water on high, the water can stir them itself sometimes if the boil is right.


Add oil to the frying pan and crack your egg(or eggs) into it. Take the lid and "dome" the egg, this cooks it faster and gives an almost poached taste to the top of the fried egg (I called it "Froa-ched").

Once it has cooked a bit add some salt and Soy Sauce to the top, and cover again. Once it is cooked how you like it your noodles should be done!!


As for the noodles, they should be slightly undercooked. You want some chew to them still. Once they are a slight translucent color dump the water, and leave a little so they do not stick.


Now to construct the ramen!

Take out the amount of bowls as needed and empty one sauce packet into each. Add a sprinkle of Soy and Salt to each.


 (If you do not like the sauce packets, use 1/2 Teaspoon Bouillon instead.)


Add desired amount of Hot Water to the bowl. You can microwave it or heat it with a kettle, but I just go for the hottest degree of tap water (it's clean, I live in Colorado). The noodles will also heat the soup.

Stir it up!


Take the Nori, cut it into thin strips, and mix in the soup.


Take your Kinchi (or desired spicy sauce), for those of us who can handle the heat! Add that to the soup.


Do not add it if you are a wimp, and will breath fire like bowser if you add spice to it!


Add the Vegetables and stir.


Add the noodles and flip it all together. If you would like to add anything else, do that now.


Last, and certainly not least, add the egg to the top of the ramen, like a tasty crown!


And, Presto! Delicious ramen! 


Now, sit back, and enjoy your ramen! It is so much fun to tell people you are "just making ramen", and then put this in front of them! You will look pretty fancy! 


Enjoying the Noms of their labor, 
-C.A.M.

Monday, December 19, 2011

Fish and Bunny Shaped Dumplings


Sure, there are a lot of ways to use leftovers, but I have found a way to use them in a more...unique kind of way! You can make these dumplings with leftovers or new ingredients, it's really up to you in the end. I had leftover wonton wrappers from Thanksgiving and since I have always wanted to try making dumplings (or Pot Stickers") shaped like a fish I decided to try! Then I thought, "Might as well teach others how to do it...If it's successful."


Well it was, as successful and exciting as finally beating a Final Fantasy game after logging about 200 hours! So let's get started!

You will need:

-Wonton Wrappers
-A Frying pan with oil
-A large pot with a lid and a steamer (anything you can use to steam these with)
-A Medium sized bowl for filling
-A Cutting board
-A Sharp Knife
-An Egg and some water (for egg wash)

Filling for 12-16 Dumplings

- 1 Cup of any type of meat, canned or leftover (I used chicken, feel free to use whatever you want)
- 3 Cloves Garlic
- 2 Tablespoons Onion or 2-3 Shallots
- 1 Tablespoon fresh Ginger (optional, but preferred)
- 1/4 Cup each Vegetables (Carrot, Celery, Soy Beans, Peas, etc.)
-A round green vegetable for the eyes (soy beans or peas)
- 1-2 Tablespoons each of any combination of sauces you have (Soy sauce, Worcestershire, Meme, Ponzu, and Sriracha if you like spicy food)

Potstickers are like pizza, you can put whatever you like in them as long as you like it and it makes at least a little sense. These are things that I like so if you like different things then you can enjoy those instead.

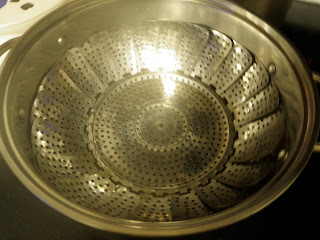
Fill a large pot with water and a bit of salt and Soy Sauce. You want just a little bit of water to steam and not boil the dumplings, so the water level needs to be about a centimeter below the steamer. Put the steamer on top, set to Medium-Low heat, and cover.


While you are cooking, if it is for a long time, you want to keep refreshing the water level so that the water does not run out and burn into the pan. I would say to add about 1/4 cup every 20 minutes or so once the water is boiling.

If you do not have a way to steam these you can try just microwaving them for about 5-10 minutes (until the skins are becoming clear) with a little bit of water, covered somehow. But I do not really recommend that method...

Prep your frying pan with the oil, but do not turn it on until you set the first round of dumplings in the steamer.

You want to mince your garlic onion, and ginger very fine, press it if possible.


Next mince the vegetables of your choice. I would say that you can put in the Peas or Soybeans you will be using for the eyes, so as not to waste them. You can also buy a pack of frozen chopped vegetables and thaw them, that will also work. Then you can take the peas out for as many fish and/or bunnies you plan to make.


Add those to the bowl with the Garlic, Onion, and Ginger.


Next mince up your meat or open the can. I advise you to not use...I really do not see that ending too well... If you are not using meat then you will obviously skip this step.


Next, add the sauces you have to taste. I used Meme, Soy Sauce, and Worcestershire (I hate spelling that word SO much!).


Mix that all up and get ready to stuff some dumplings!


Next mix up some egg wash in a small bowl. Mix the egg with a splash of water and you're done!


Add a spoonful of the filling to each wrapper right in the middle.


Depending on how fat you want your animals is how much you want to add.

Apply the egg wash around the whole wrapper.


Now the rest depends on what you want to make!

~Fish~

Seal the dumpling right in the middle making a ridge sticking up, like a fin, leaving the ends unsealed.


Seal one end completely flat.

Then pinch it down the middle to form the tail.


Next you want to seal the dough together but not flat like the other end, leaving the middle open. Like this:


Use your fingertips to form the eyes by sticking one or two inside and then pinching down in-between.


They should look a like this in the end.


This is where the "eyes" are going to go.


~Bunny~

Fill and seal the middle like you do on the fish, but press down the ridge so that your bunny has no dorsal fin...


Flatten the end, again like the fish, and then fold the ends on each other to form a triangle.


Flatten down the other end, but have the folds be slightly apart from each other, so it comes out more like a triangle than a square. You want a space in between the "ears"


Then fold the section up and against the middle and form the ears to your liking.


They should look like this.


Next press little divots under the ears so the eyes have a place to stick into.


~Regular~

If you are boring you can just seal the whole thing along the top and make them "normal".


To Cook

Place your dumplings in the steamer 2-5 at a time and cook covered for about 5 minutes, or until the skins are a little translucent.


Turn on the frying pan while these are cooking.


Then fry the bottoms until golden brown and crispy, about 3-5 minutes depending on how how the pan is.


For the Bunny dumplings you want to hold the ears up after they are steamed and they are in the pan, so they do not stick to the body.


You probably want long chopsticks so you do not get burned....


Once they are cooked remove them from the pan (duh) and add the eyes.

Like I said before, any round vegetable will work, green works well.


These are both Kawaii and Oishii!!

(....Cute and Delicious....)

Repeat until you run out of filling, wrappers, or time!


And there you have it! Shaped, or unshaped for weirdos, dumplings!

I hope you enjoy!

Enjoying the noms of their labor,
-C.A.M.

Tuesday, November 1, 2011

The Otaku's Generic Anime Bento


So, if you are anything like me then when you watch your favorite Anime you think, "I want to make a Bento Box
like that!" and then you try to figure out how to make the delicious animated lunch you see on the screen.
But, alas, 'tis all in vain! You can
not seem to do anything right!

Well I have wonderful news! After all my years of personally searching I have figured out how to make a basic Bento! In this post I will show how to make;
Tako Sausage (Octopus shaped sausage)
Tamagoyaki (Sweet egg Omelet)
Steamed and decorated white rice
Edamame (Soy Beans)

And there was much rejoicing!

(I'm sorry, but we will save the elusive bunny shaped apples for another time)

So lets get it on like Donkey Kong!

Tako Sausage


First thing that you MUST do if you want to make these is to get the right kind of sausages! I do not know if I can stress how crucial this is. Part of the reason that it took me so long to figure out how to make these right is because I kept using the wrong type of viener over and over again! NIEN! You cannot do that as well! There is no using Little Smokies, Cocktail Wieners, and absolutely no Vienna Canned Sausages! NO BUENO!

What you want to use is this!


This is an Asian Mini Pork Sausage pack found at the local (or non-local) Asian Market. You can choose any flavor you would like ;)

Once you have that you can begin.


Get your best non-stick pan and add a little bit of oil to it, and set it to medium-low heat. Let that heat up a little bit, make sure the pan does not get too hot because then you will have burnt octopuses (Octopi?), and although that may sound appealing to you, it does not to me...


Then you are going to thaw your delicious sausages. You want roughly four per person. Do not cook them in it for too long, you just want them thawed enough to cut easily.


Get out the sharpest knife you have, and it should also be small.


Now you are going to cut these about half or two thirds of the way up the sausage. You can either cut four legs (recommended version) or, for the super realists out there, eight legs. Just slice down the side and cut it in half, then turn and cut it again.


It should look something like this.


Next, put the little bugger right in the pan and watch the magic! O.O


It will start to open up and the little legs will curl up and out forming kawaii little tentacles!


Once they have spread apart a bit then you want to prop it up so that they fry in that position. It only takes a few minutes to cook each one.

Once you get the hang of it you can cook a bunch of them at once, but keep a close eye on them making sure they do not burn! (You know how I feel about the burnt octopi)


I would suggest only doing three to five at a time so that you can keep a good watch on them.

Look at the cute little dancing ocean-animal-shaped meat creatures!


You can cook them plain like this or add seasoning like soy sauce to them.


Speaking of eyes, if you want those then you can has! I warn you now though, it is quite a pain in the spiders back carapace to do this!

Take some sesame seeds and stick them in for eyes, the darker seeds the better. It will be difficult to stick them in (you will probably need to puncture a little hole in it

first to be able to do so) before you put them in the pan.


Set these aside and we shall now move on to the other dishes.


Steamed Rice

This is a pretty simple thing, but because it is simple it can be messed up easily as well. I like to use a rice cooker to do this, if you do not have one than you can use a pan. You will want to use Jasmine Rice for Japanese cooking.


When I cook rice I average about 1/2 cup rice per person. Measure that out into the cooking utensil of your choice.


You are going to need to rinse the rice, it will look cloudy once you add water to it. Rinse and drain the rice about four times or until the water is relatively clear. (It should be like tap water, not lake water!)


I find the best way to rinse it is to add about double the water and then make a claw, like an evil villain or 80's rocker, and then spin it around the rice a few times (about 20 seconds), then drain the water and repeat.


Once the water is pretty clear CAREFULLY drain the water out (It is not the end of the world if there is a little bit left in there).

Then add an equal amount of water as rice and then add an extra 1/2 cup of water (a little bit more than 1/2 if you are doing it on the stove top.)


Plug it in and let it cook, unplug it immediately once it is finished so the rice does not burn. For the stovetop cook on low heat for 15-20 minutes and keep a close eye on it.


When you are putting together the Bento you can add whatever you want to the rice, seaweed is preferable. You can buy strips, sheets, or flakes to put on top.


These are a few of my favorites, also found at the local or non-local Asian market!


Tamagoyaki (For Noobs, Sweet Egg Omelet)

I developed this recipe myself, I tried a bunch of others and they did not taste how I wanted them to. For some people it will take a while to get used to a sweet egg, we are so used to our salty ones after all, but it is a really easy and tasty snack once you know how to make it.

Ingredients for this per serving are,

1 Tablespoon cold water, 1 egg (room temp. not cold), about 1/4 teaspoon soy sauce, and about 1 teaspoon of sugar.


*Most people use sugar and salt but I prefer the taste soy sauce and it is less grainy that way.
I eyeball it when I add the ingredients but I found that the measurements are just about right. You can do it to taste if you like it saltier or sweeter, but keep in mind it is a SWEET egg omelet, not your mamma's Tex-Mex Fiesta Grande omelet!


Mix this very well, you want the sugar to be mixed in and dissolved or you will have an odd grainy mess on your hands, ewwwww....

You also want it mixed well so it comes out yellow and not multi-colored!

<- Mix it even more than this!


Your pan should be the best non-stick pan (to the rescue yet again!) and it should have some oil, shortening, etc. in it because you cannot afford for the egg to stick on the pan at all.
Heat the pan to Medium-Low, like a 3 out of 10. Make sure to keep an eye on the heat, the egg should not sound like a snake when it hits the pan (SSSSSSSS!!), it needs to be cooked slowly.

If you are cooler than me you will use a fancy square pan to cook this in, it makes it come out looking a lot sharper.


Pour the egg mixture into the pan and make sure it is spread out thin and evenly.
Let it cook so that the bottom is cooked all the way and there is a little bit of raw egg on the top, this is used for it to stick together and roll it up.


Flip it about 1/3 of the way across and let it sit for a few seconds, then fold it again so there is only a little bit unrolled and let it sit for a few seconds, then fold it al the way over and let it cook on one side for about 30 seconds and flip over and let it cook another 30 seconds. You want the egg to be slightly undercooked.


It may take a few tries to get good at this, just serve the good looking ones to the guests and keep the others for yourself. ;)


Remove the omelet and let it rest for about a minute. If there is any excess oil you will want to dab that off.

Then cut them however thick or thin you would like, I do about an inch wide per piece.


Set them aside, they can be hot or cold when you eat them.
Each omelet should yield about six pieces.


Edamame (Soy Beans, once again for the noobs)


This has to be the hardest one out of all of these to make!!!

....Kidding.

This is the easiest thing to make out of all of these, you do not even need to go to the non-local Asian market to find these!


First, buy some Edamame. You can find them in the frozen section of pretty much any grocery store. Some even have the "Easy Steam" thing going on, where you just stick the bag in the microwave and heat them in the bag.
You can steam these in the little steamer piece on your rice cooker, but I do not like them over cooked so I prefer separate cooking.


Defrost them in a microwave or in a pan so they are hot.


Add salt if you so wish and set these aside as well.


Making Your Bento

Now that everything is ready and "set aside" we can get to the fun part!


I have a plethora of bento boxes myself, if you do not you can use a plate or a tupperware, that is what I had to do when I started. :)


Put the rice into the container of choice and lightly pat it down. Add whatever topping you would like to it, pickled plumb, seaweed, etc.

I used a mixture of seaweed and rice crackers, my favorite flavor wise.

Put the Edamame next to that, using fancy plastic grass if you have it to separate them.


In the other side place your little Tako Sausages and
Tamagoyaki. I added a little soy sauce bottle shaped like a fish, because I think it is pretty kawaii~!


There you have it!


This is how I made mine, but it is all about getting creative and making it look however you would like!


If you have no bento box you can also make it like this.


Hurrah for plates!


I do realize that it does not look exactly like the ones in the Anime, but do people really look like that? Hmmmmm? :/


Anyways, congratulations! You are now ready for watching you favorite Anime! (I will not accept Naruto, Bleach, or anything else that is Americanized on Cartoon Network BTW, more like Rurouni Kenshin, Rayearth, Darker Than Black, Azumanga Dio, FMA, or FMP)

You can also give this to the person you like, take it to the sports meet or cultural festival, or any other typical activity you see an Anime character partaking in!

Have fun ;)

Enjoying the Noms of their labor,
- C.A.M.